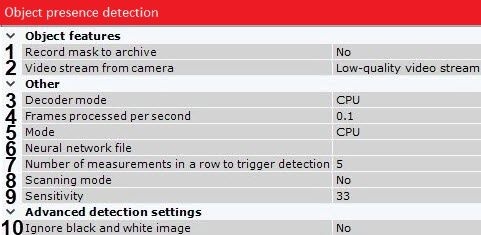
Select the processor for the neural network operation—CPU, one of NVIDIA GPUs or one of Intel GPUs (5, see Hardware requirements for neural analytics operation, General information on configuring detection). If you specify other processing resource than the CPU, this device will carry the most of computing load. However, the CPU will also be used to run the detection tool.
|
Select a neural network file (6). The standard neural networks for different processor types are located in the C:\Program Files\Common Files\Grundig\DetectorPack\NeuroSDK directory. You don't need to select the standard neural networks in this field, the system will automatically select the required one. If you use a custom neural network, enter a path to the file.
Example. The sensitivity parameter value of 40 means that the detection tool will trigger when the scale has at least 4 divisions full over the entire analysis period. The triggering will stop when the scale has less than 2 divisions full over the analysis period. The detection tool will trigger again if the scale has at least 4 divisions full over the entire analysis period.
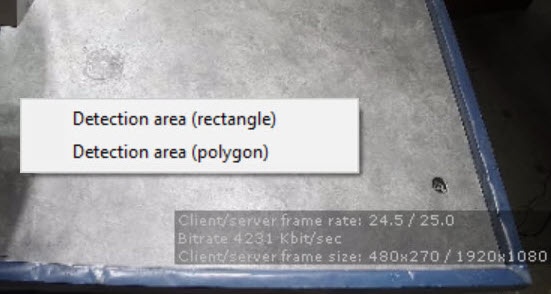
- Right-click in the preview window.
- If you want to set the detection area by one or more rectangles, select Detection area (rectangle). If you specify a rectangular area, the detection tool will work only within its limits. The rest of the frame will be ignored.

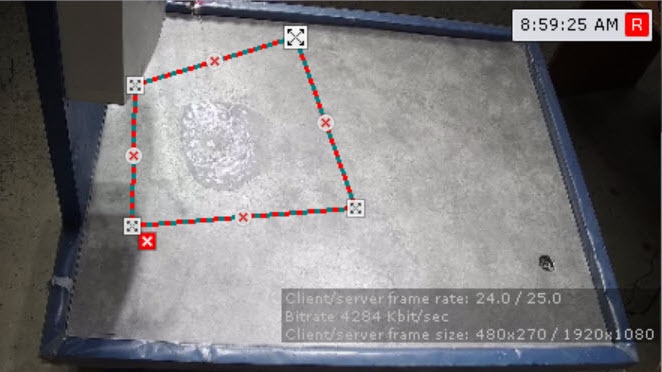
If you want to set the detection area by one or more polygons, select Detection area (polygon). If you specify one or several polygonal areas, the detection tool will process the entire frame, but the part of the frame that is not included in the specified polygons will be blacked out.

You can configure detection areas similarly to exclude areas in Scene analytics detection tools (see Setting General Zones for Scene analytics detection tools).
You can use trial and error method to decide which type of detection area (rectangular or polygonal) is more effective in your case. Some neural networks give better detection with rectangles, while others are better with polygons.