Page History
| Tip |
|---|
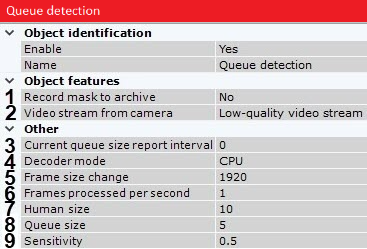
To configure the Queue detection tool, do the following:
- To record mask (highlighting the queue on the video) to the archive (see Displaying information from a detection tool (mask)), select Yes for the corresponding parameter (1).
- If the camera supports multistreaming, select the stream for which detection is needed (2). Selecting a low-quality video stream allows reducing the load on the Server.
Set the event transmission interval in seconds for sending the data to the AxxonData report subsystem (see Queue length report), if the queue length exceeds the set limit (3). If 0 value is selected, no events will be transmitted.
- Select a processing resource for decoding video streams (4). When you select a GPU, a stand-alone graphics card takes priority (when decoding with NVIDIA NVDEC chips). If there is no appropriate GPU, the decoding will use the Intel Quick Sync Video technology. Otherwise, CPU resources will be used for decoding.
Analyzed framed are scaled down to a specified resolution (5, 1920 pixels on the longer side). This is how it works:
If the longer side of the source image exceeds the value specified in the Frame size change field, it is divided by two.
If the resulting resolution falls below the specified value, it is used further.
If the resulting resolution still exceeds the specified limit, it is divided by two, etc.
Info title Note For example, the source image resolution is 2048*1536, and the specified value is set to 1000.
In this case, the source resolution will be halved two times (512*384), as after the first division, the number of pixels on the longer side exceeds the limit (1024 > 1000).
Info title Note If detection is performed on a higher resolution stream and detection errors occur, it is recommended to reduce the compression.
- Set the frame rate value for the detection tool to process per second (6). This value should be in the range [0,016; 100]. The higher the value of this parameter, the higher the CPU load.
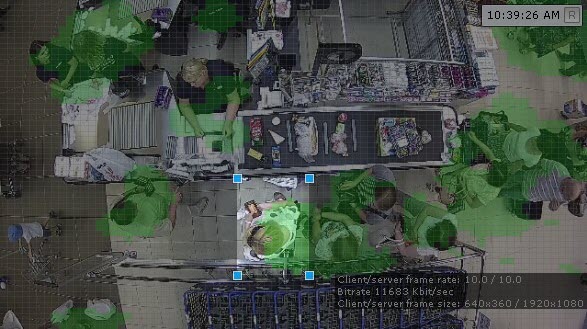
Click the button and set the minimum size of a human (7). You can do so by dragging the anchor points of the rectangular area.
Info title Note It is recommended to set the minimum size of a human graphically. The number in the Human size field is a conventional value.
- Specify the number of people in the queue above which the detection tool triggers (8). The value should be in the range [2; 20].
- Specify the detection tool sensitivity in standard units from 0 to 1 (9). The higher the sensitivity, the smaller the disturbances will be attribute to the queue, i.e. the algorithm will react to more insignificant movement. If you specify the lowest sensitivity value, the detection tool will process only significant changes in the scene.
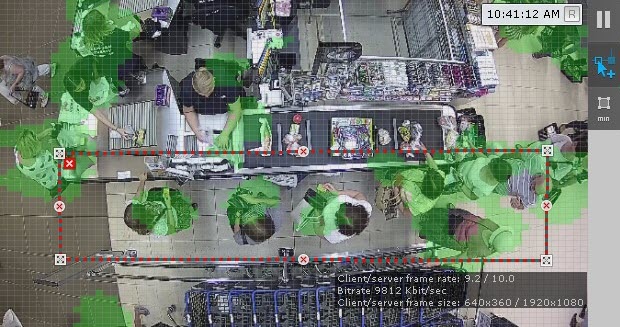
You should set the sensitivity value empirically based on the Motion Mask data displayed in the preview window. - In the preview window, you can set the detection areas with the help of the anchor points much like privacy masks in Scene Analytics detection tools (see Setting General Zones for Scene analytics detection tools).
- Click the Apply button.
The Queue detection tool is now configured. When the detection tool is triggered, the following events are generated:
| No Format |
|---|
Camera. Detection "Queue detection" triggered, queue (min.: 10, max.: 10) |
where min. and max. is estimated queue length.


