Documentation for C-Werk 2.0.
Previous page Next page
To add a comment, click the ![]() button. A dialog box for entering a comment will open.
button. A dialog box for entering a comment will open.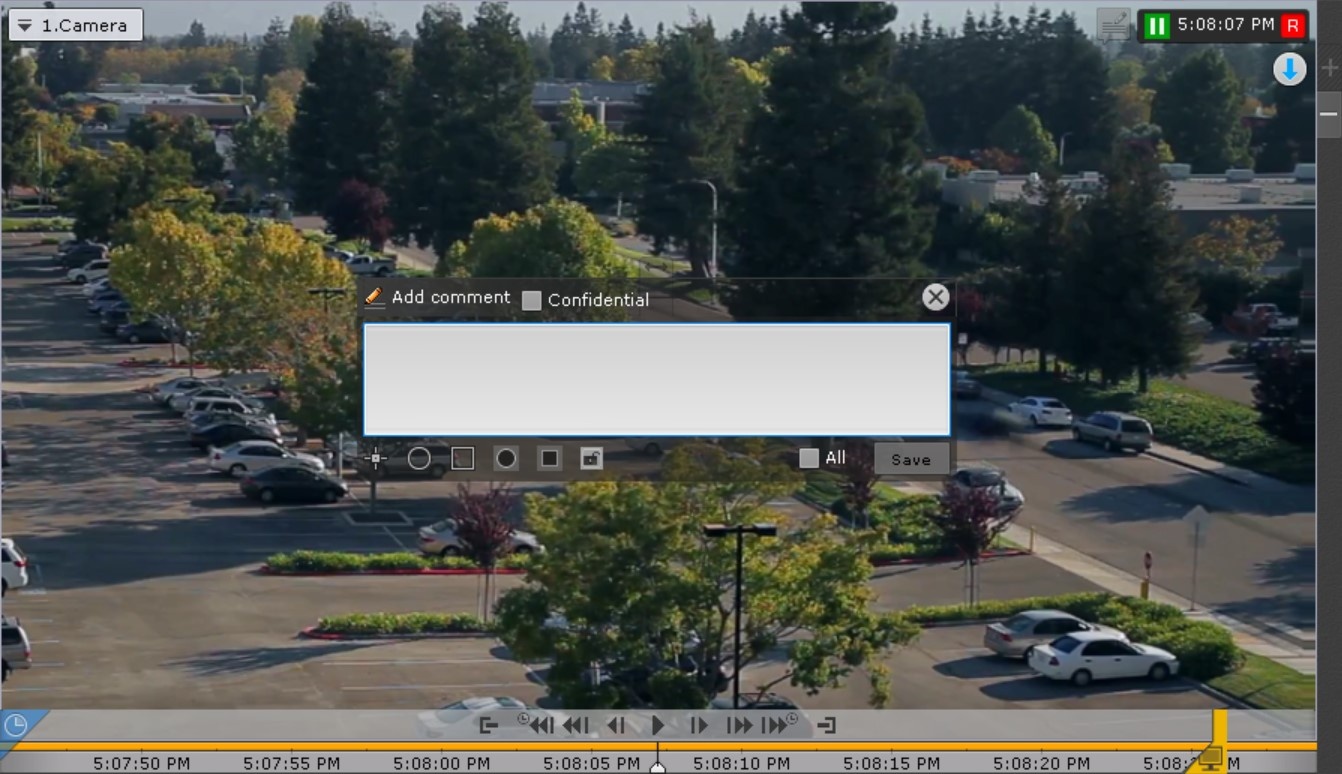
The number of characters in the comment is limited.
The following parameters can be configured:
- Position of a comment in the frame—you can move the window with the comment when you click the window title and hold it with the left mouse button.
- Transparency of the comment window is adjusted by moving the
 slider from left to right, from opaque to maximum transparency.
 - Marking the area of interest in the frame. You can mark the area with a dot (
 ), an oval (
 ), or a rectangular (
 ) area. To do so, do the following:
- Click the corresponding button and then click anywhere in the frame. The selected element will be displayed.
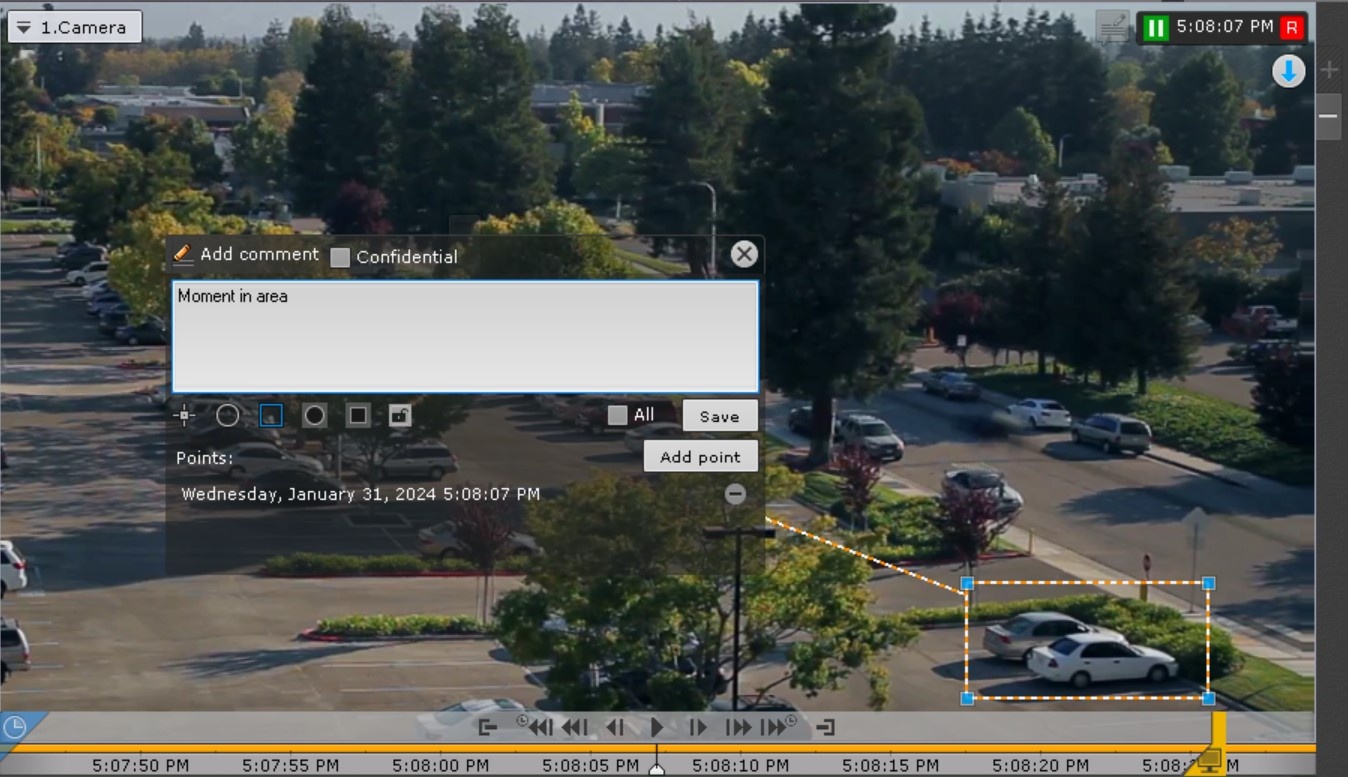
- Move the element to the required area of the frame. To do this, left-click on the element and move the cursor without releasing it.
- Set the size of the element by stretching its anchor points.
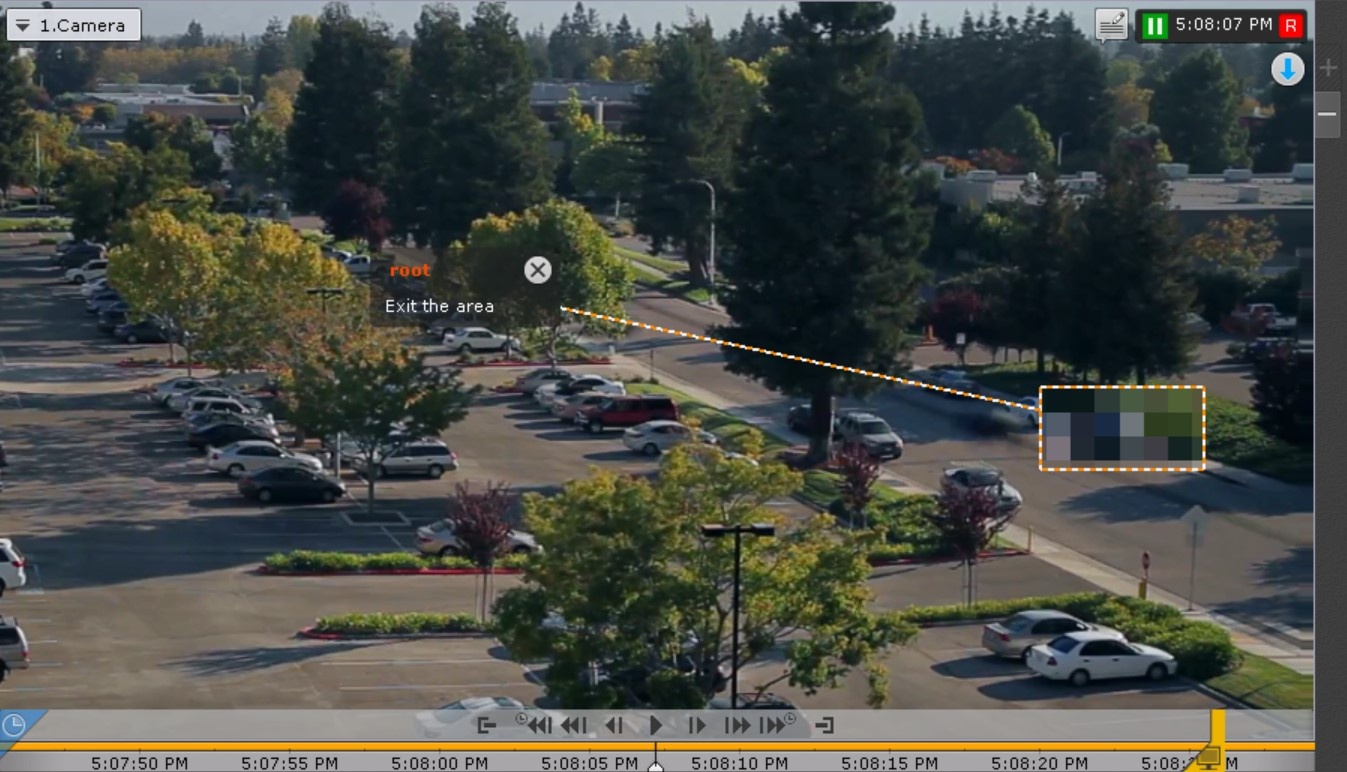
Points will be displayed below the comment. You can set several points in different frames. To do this, go to another frame, move the element in it to the required area, and click the Add point button. To delete a point, click
 . As a result, one comment will be displayed for all added points.
Note
You can set points only for an oval and a rectangular area.
- Click the corresponding button and then click anywhere in the frame. The selected element will be displayed.
- Marking the privacy zone—the area of the frame that should be hidden. You can mark it with an oval (
 ) or a rectangular (
 ) area. To do so, do the following:
- Click the corresponding button and then click anywhere in the frame. The selected element will be displayed.
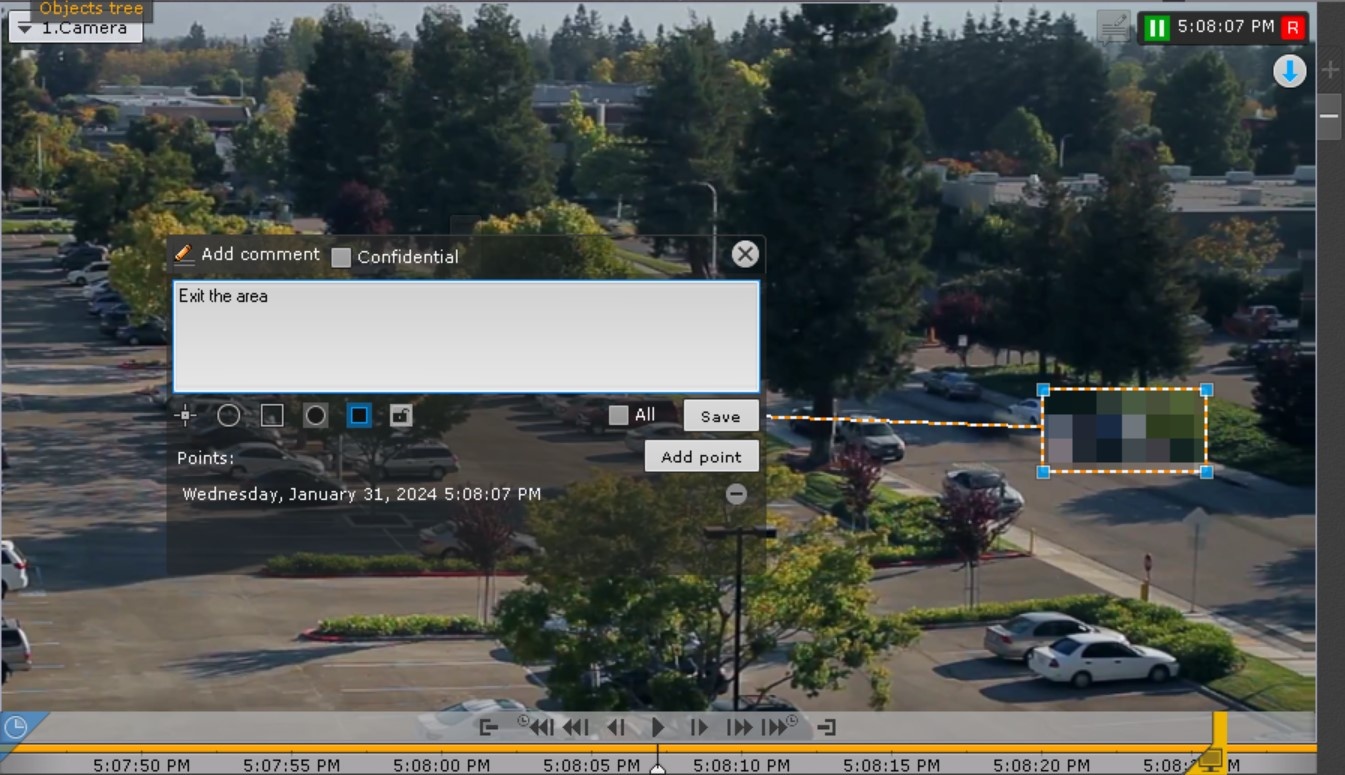
- Move the element to the required area of the frame. To do this, left-click on the element and move the cursor without releasing it.
- Set the size of the element by stretching its anchor points.
The Mask position will be displayed below the comment. You can set several positions in different frames. To do this, go to another frame, move the element in it to the required area, and click the Add button. To delete a position, click
. As a result, one comment will be displayed for all added positions.Note
The privacy zone cannot be set in real time.
Note
For one comment, you can specify either the area of interest, or the privacy zone.
- Click the corresponding button and then click anywhere in the frame. The selected element will be displayed.
- Protection of an archive interval with a comment from overwriting. To protect archive records with a comment from being deleted, click the
 button. To cancel protection, click the
  button (see Setting up record protection).
 - Adding a comment to all cameras on the layout—set the All checkbox.
- To make a comment confidential, set the Confidential checkbox. Such comments are visible to users who have rights to access confidential comments (see Creating and configuring roles).
To save the comment, click the Save button. Otherwise, click ![]() to cancel.
to cancel.
After being saved, a comment is displayed in the frame as specified. To delete the comment, before you perform any other command in the system, click the ![]() button.
button.
Overview
Content Tools